Audio Bests
I saved hundreds by creating my own NAS home server.
Say Goodbye to Costly Storage: Embrace Affordable Alternatives!
Unlock the Power of DIY: Crafting Your Own NAS for an Affordable Future
In today’s digital age, managing data effectively while keeping costs in check is more crucial than ever. Enter Network Attached Storage (NAS)—a self-hosting solution that liberates you from ever-increasing subscription fees for data services and streaming. Whether you're archiving cherished memories or streaming high-definition content while on the move, sufficient options exist. However, finding an affordable solution that meets your unique needs can be challenging.
If the thought of investing in a high-priced NAS system has deterred you, a DIY NAS option could be the perfect budget-friendly alternative. Building your NAS from scratch allows you to customize it to your specific requirements while also saving money.
DIY NAS Building vs. Pre-Built Solutions
Before diving headfirst into a DIY project, it's essential to align your objectives with what this technology can accomplish. Pre-built systems from manufacturers like QNAP and Synology offer convenience and user-friendly interfaces, complete with operating systems and software designed to streamline tasks like document sharing and backups. They come equipped with support for Docker containers, hardware RAID setups, and scalability for advanced applications. However, the catch is that ease of use comes at a price.
On the flip side, crafting your own DIY NAS requires a bit more initial effort regarding hardware selection and software installation. The payoff, however, is significant. A DIY NAS approach generally provides greater processing power for your investment and unparalleled freedom to upgrade as your needs evolve. Plus, recycling old laptops, PCs, or even utilizing a Raspberry Pi can yield substantial savings. For years, I ran my own home server successfully using a Raspberry Pi 4.
Fortunately, I’m not alone on this journey; an abundance of guides and software available can simplify the setup process considerably. For managing your DIY NAS, I highly recommend OpenMediaVault (OMV), which is compatible with both Arm and x86 CPUs. For those seeking the advanced ZFS file system for pooled storage, consider trying TrueNAS Scale alongside OMV. Familiarizing yourself with docker-compose will also be advantageous for installing applications later on.
Choosing the Hardware for Your Budget NAS
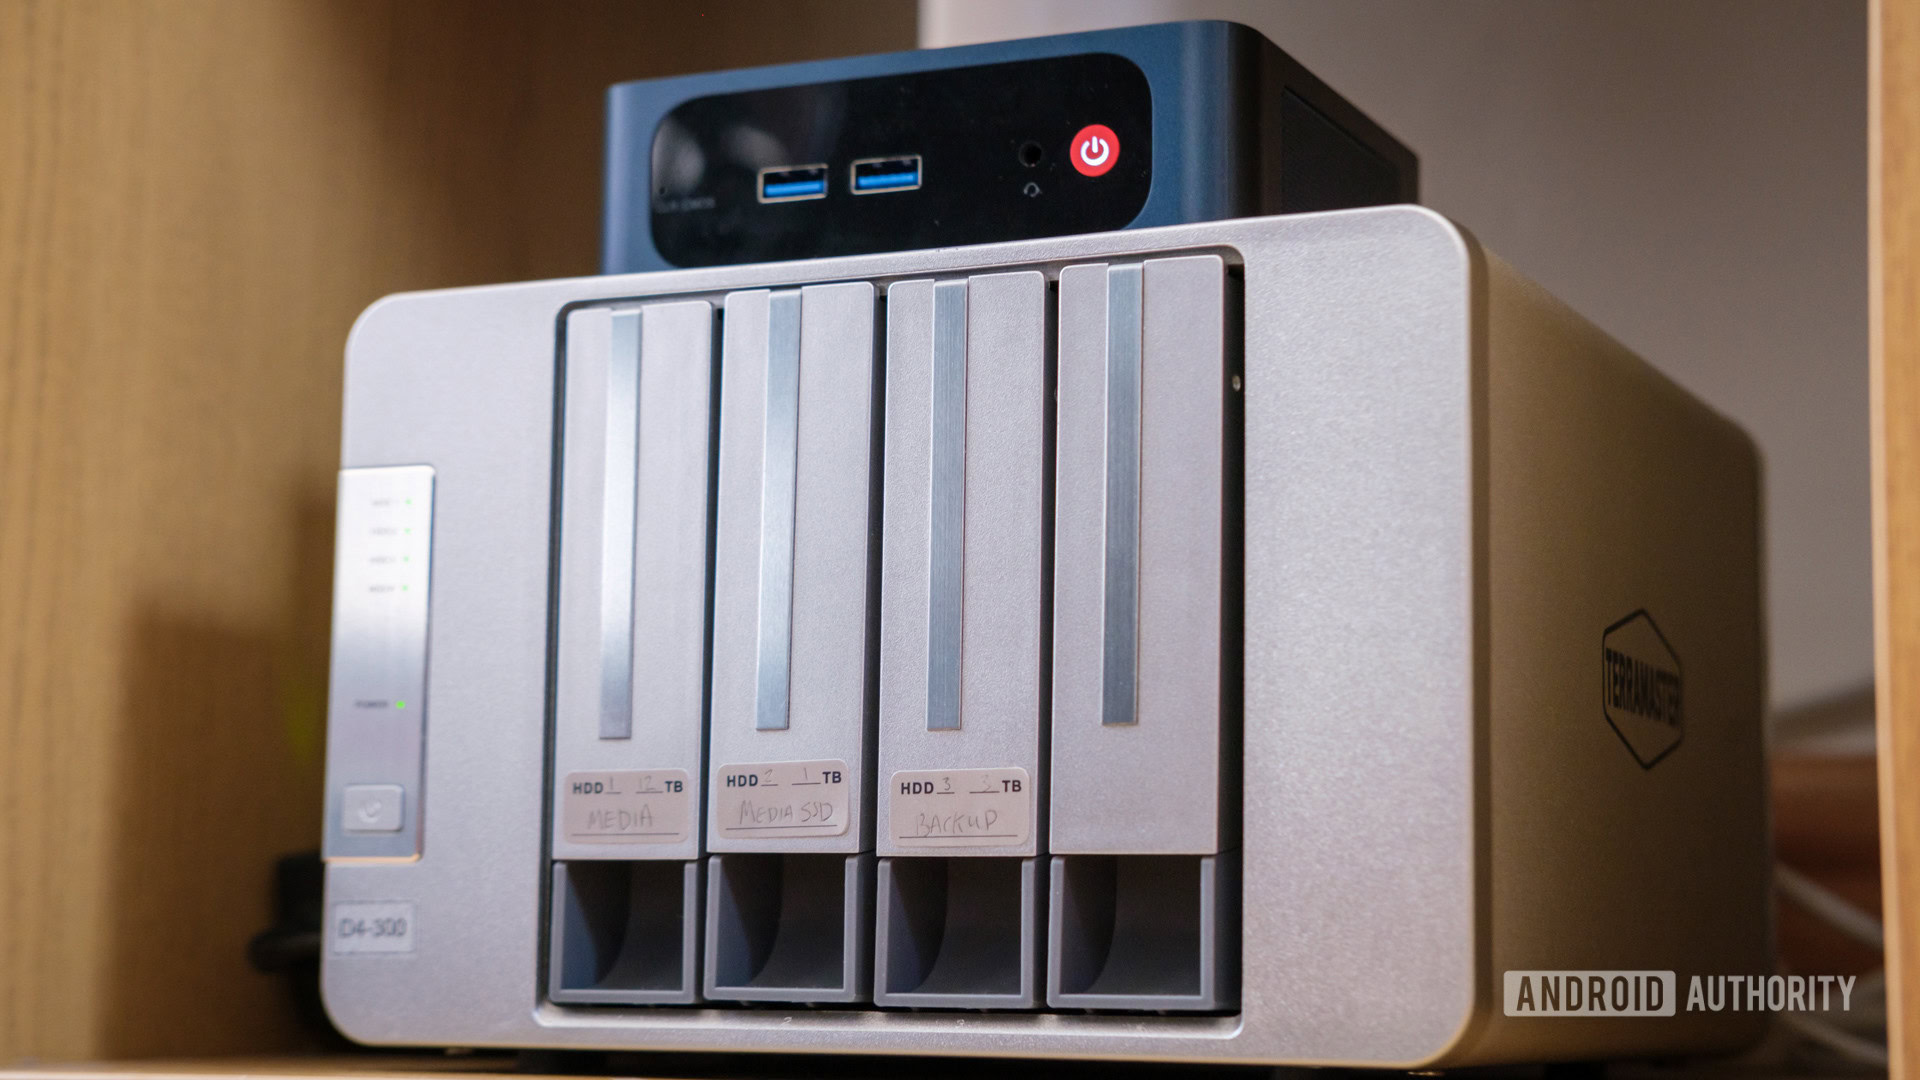
When planning your DIY NAS, consider two primary options: a dedicated enclosure akin to a traditional PC or a mini-PC leveraging Direct-Attached Storage (DAS). Opting for a dedicated enclosure allows you to recycle an old CPU while providing multiple NVMe and SATA ports for superior performance. However, this route can lead to increased complexity and unforeseen costs if you're starting from scratch.
If you’re seeking an uncomplicated and economical BEGINNING, I recommend going the mini-PC and DAS route. It’s simpler to set up and upgrade when your requirements expand. While mini-PCs may not provide as many NVMe/SATA hard drive connections as larger motherboards, they still offer sufficient performance for typical storage needs. While viable USB 3.0 connections can handle everyday tasks like storing photos and music, for larger data transfers, consider investing in 10Gbps USB 3.1 Gen 2 solutions—though these can run pricier.
Crucially, picking the right CPU or mini-PC is vital. Since a NAS will be running continuously, opt for low-idle power CPUs balanced with necessary performance. Novice NAS users focusing on file sharing will need minimal processing power, whereas transcoding 4K videos will require more robust solutions.
Installing and Configuring Your DIY NAS Software
While selecting the right hardware is essential, the actual installation of your NAS operating system can reveal the true value of your DIY project. Although a detailed guide can’t cover every possible option, here are a few beginner-friendly tips to ensure a smooth installation process.
Choosing an operating system is critical for your NAS. Stick with a headless OS like a Linux distribution to maximize efficiency and minimize complications associated with graphical user interfaces. Although it may seem intimidating at first, OpenMediaVault provides an intuitive bootable ISO for effortless installation. Simply flash the program onto a USB drive, boot, and follow the prompts to get OMV up and running.
In my case, my new mini-PC didn’t initially recognize the LAN hardware, so I opted for a straightforward installation of the latest Debian version, ensuring SSH was enabled for command-line access. After booting up, I installed OpenMediaVault, making sure to log in via a web browser using the local IP address assigned by my router. This effectively minimized my command line interaction.
Once you have your OMV system operational, you can start enhancing its functionality with various applications. Enabling Docker is the next step. After installing the Docker plugin, you can dive into the world of self-hosted software ranging from media servers to document management, all tailored to fit your preferences.
Conclusion: Embrace the DIY Calculator for Expanding Your Storage Capability
Crafting your own DIY NAS offers unparalleled flexibility, affordability, and control over your data management needs. Whether you're archiving photos, streaming media, or setting up your private cloud service, building a cost-effective NAS can eliminate the need for expensive cloud subscriptions. With an off-the-shelf solution suitable for those pressed for time, this guide aims to inspire a renewed enthusiasm for self-built NAS systems. Take charge of your data and enjoy a vastly more powerful and customizable solution—without breaking the bank!